
Into this:

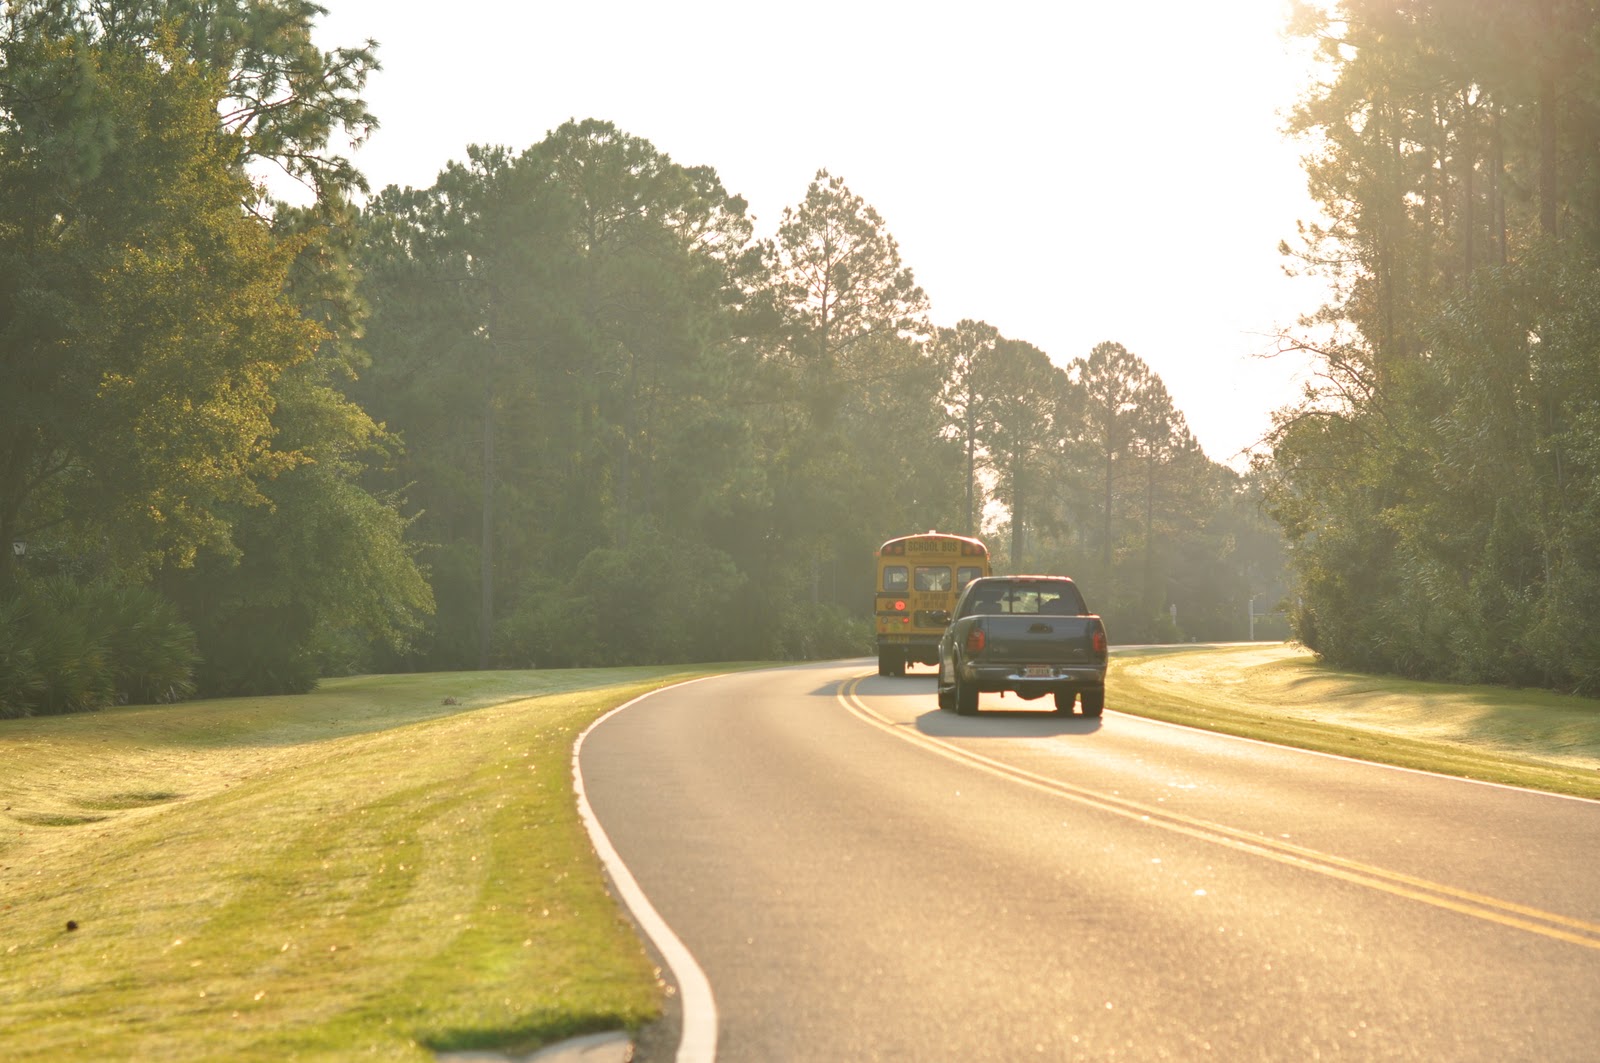
This was a one time shot. Out the window of my car, only two school buses go to the school, and this one had already dropped off the students, so it was empty. The first issue was the necessary crop. The truck was not in my mind's eye, nor was the drainage ditch in the forefront, so they were chopped. Then I took it into Photoshop and played with it. You can use pretty much any editing program to do what I did, whatever came with your camera, or Photoshop Elements. I boosted the exposure to lighten it a bit, and then saved a copy. So then I had two pictures, a light one and a dark one. I opened a new file and brought in both pictures as layers (dark one underneath). I created a third layer and I painted over the blacks in the bus using a teeny tiny little ole' paintbrush, and then reduced the opacity to about 24% so it didn't look goofy.

Then, to make the fall leaves pop on the leftside (to give them the appearance of depth) I removed the upper left quadrant of the lightest layer with my eraser tool, at about 50% opacity, to reveal the darker layer a bit.

I fooled around a bit with where I wanted the depth, and when I was happy with it, I was done. I'll be quite honest though, it is much easier to get the shot right out of the camera! In a pinch though, some thoughtful edits can make a "bleh" picture palatable. I took the photo for a class I am taking, and the picture prompt for that day was "Me Time." I felt the bus represented the time that I have while the girls are in school.
2 comments:
Thanks so much for the tutorial Marie! Awesome pic and I love seeing how you created it.
I love seeing how you transformed it. I agree, SOOC is much easier! I would get lost trying to do what you did to this picture! Great job! Love the finished product.
Post a Comment